
The complete guide
How To Choose And Use A Wireless Endoscope Camera
The problem with things you cannot see
Almost every awkward repair starts the same way. Something is wrong somewhere you cannot look. A drain backs up and you do not know whether it is hair, grease or a cracked joint. An engine burns oil and you would like to see the cylinder wall before committing to a teardown. A cable disappears into a stud bay and never comes out the other end.
The usual options are bad. You can guess and hope. You can take things apart until the problem becomes visible, which costs hours and sometimes breaks clips and gaskets that were fine before you touched them. Or you can pay someone with the right tool to come look for ten minutes.
A wireless endoscope replaces all three. You feed a 5.5mm camera into the space, look at your phone, and know. The job either gets much simpler or you at least stop guessing about what you are dealing with.
How a borescope actually works
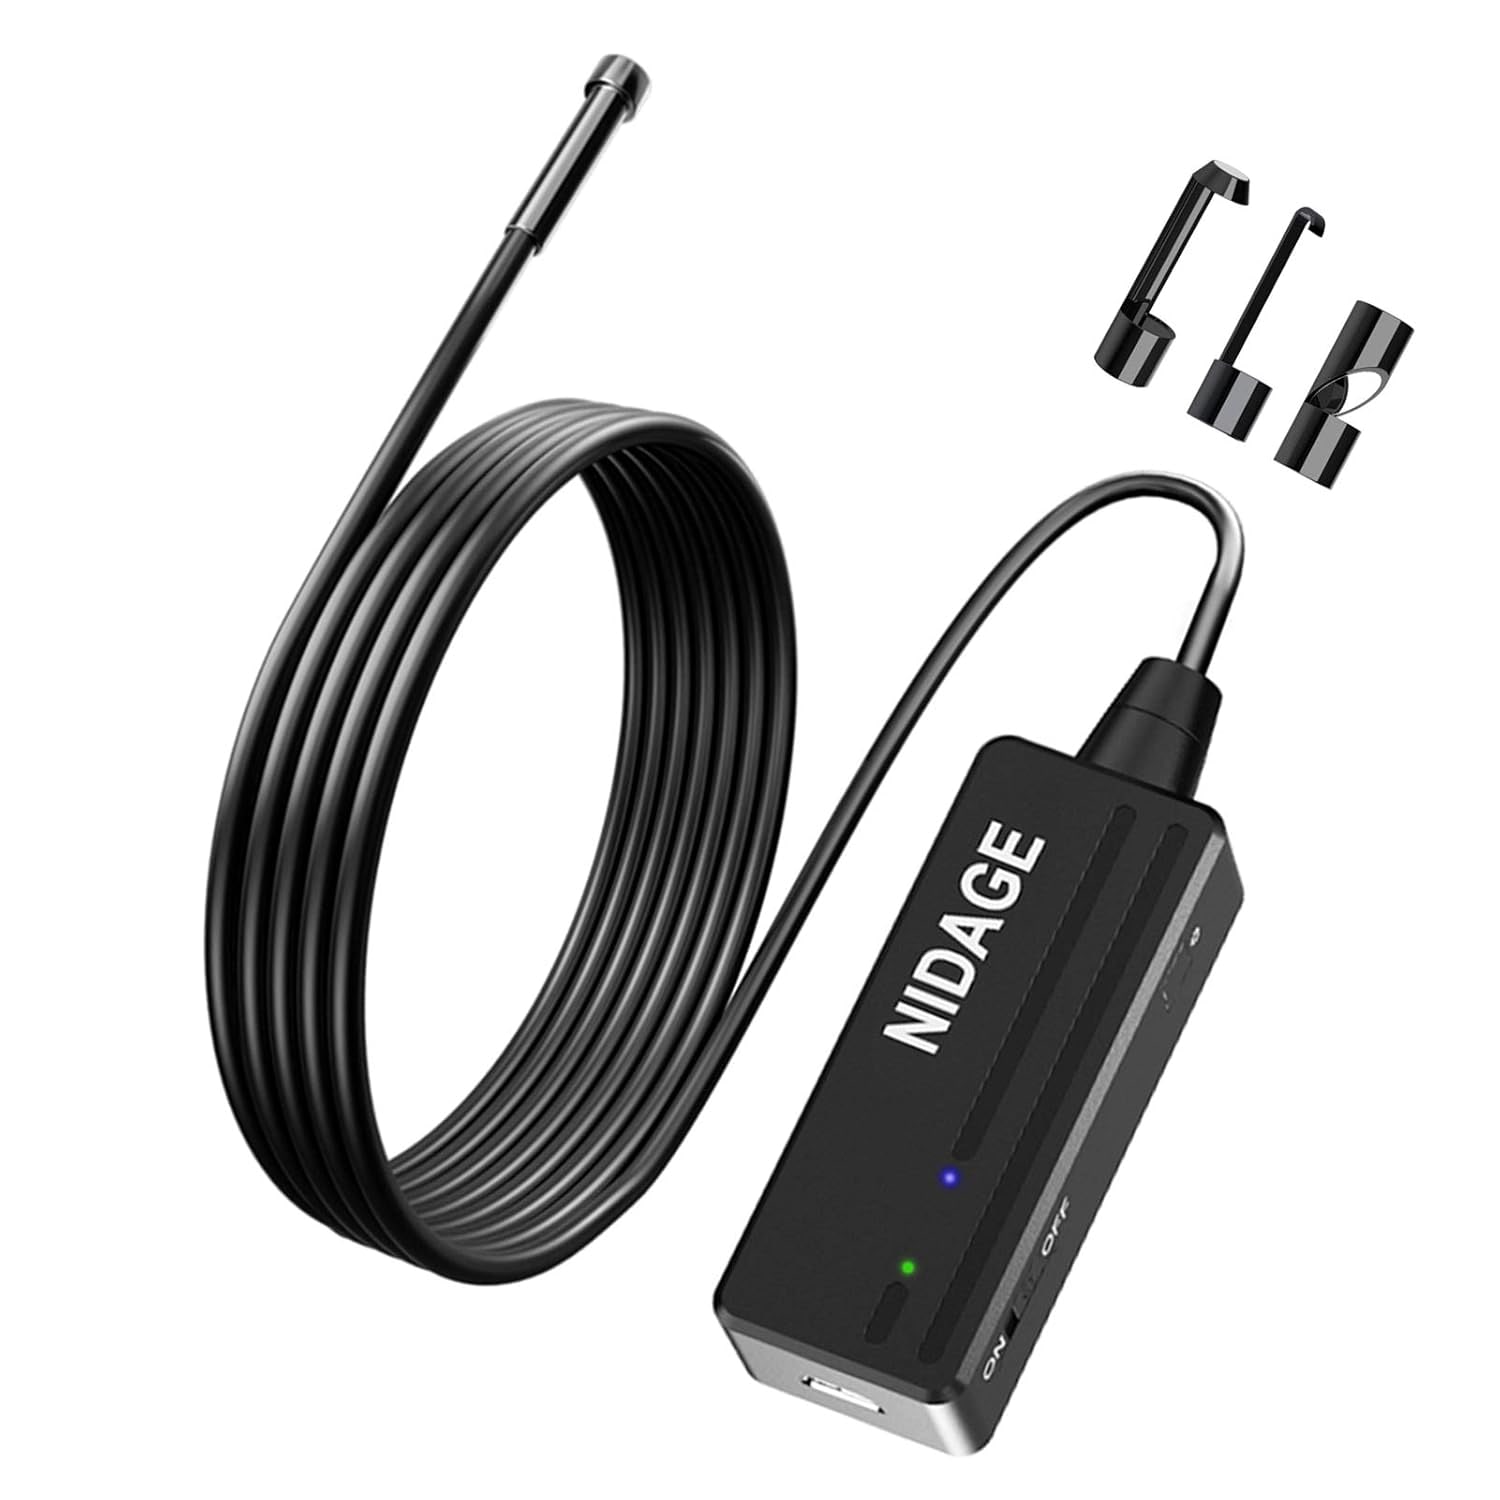
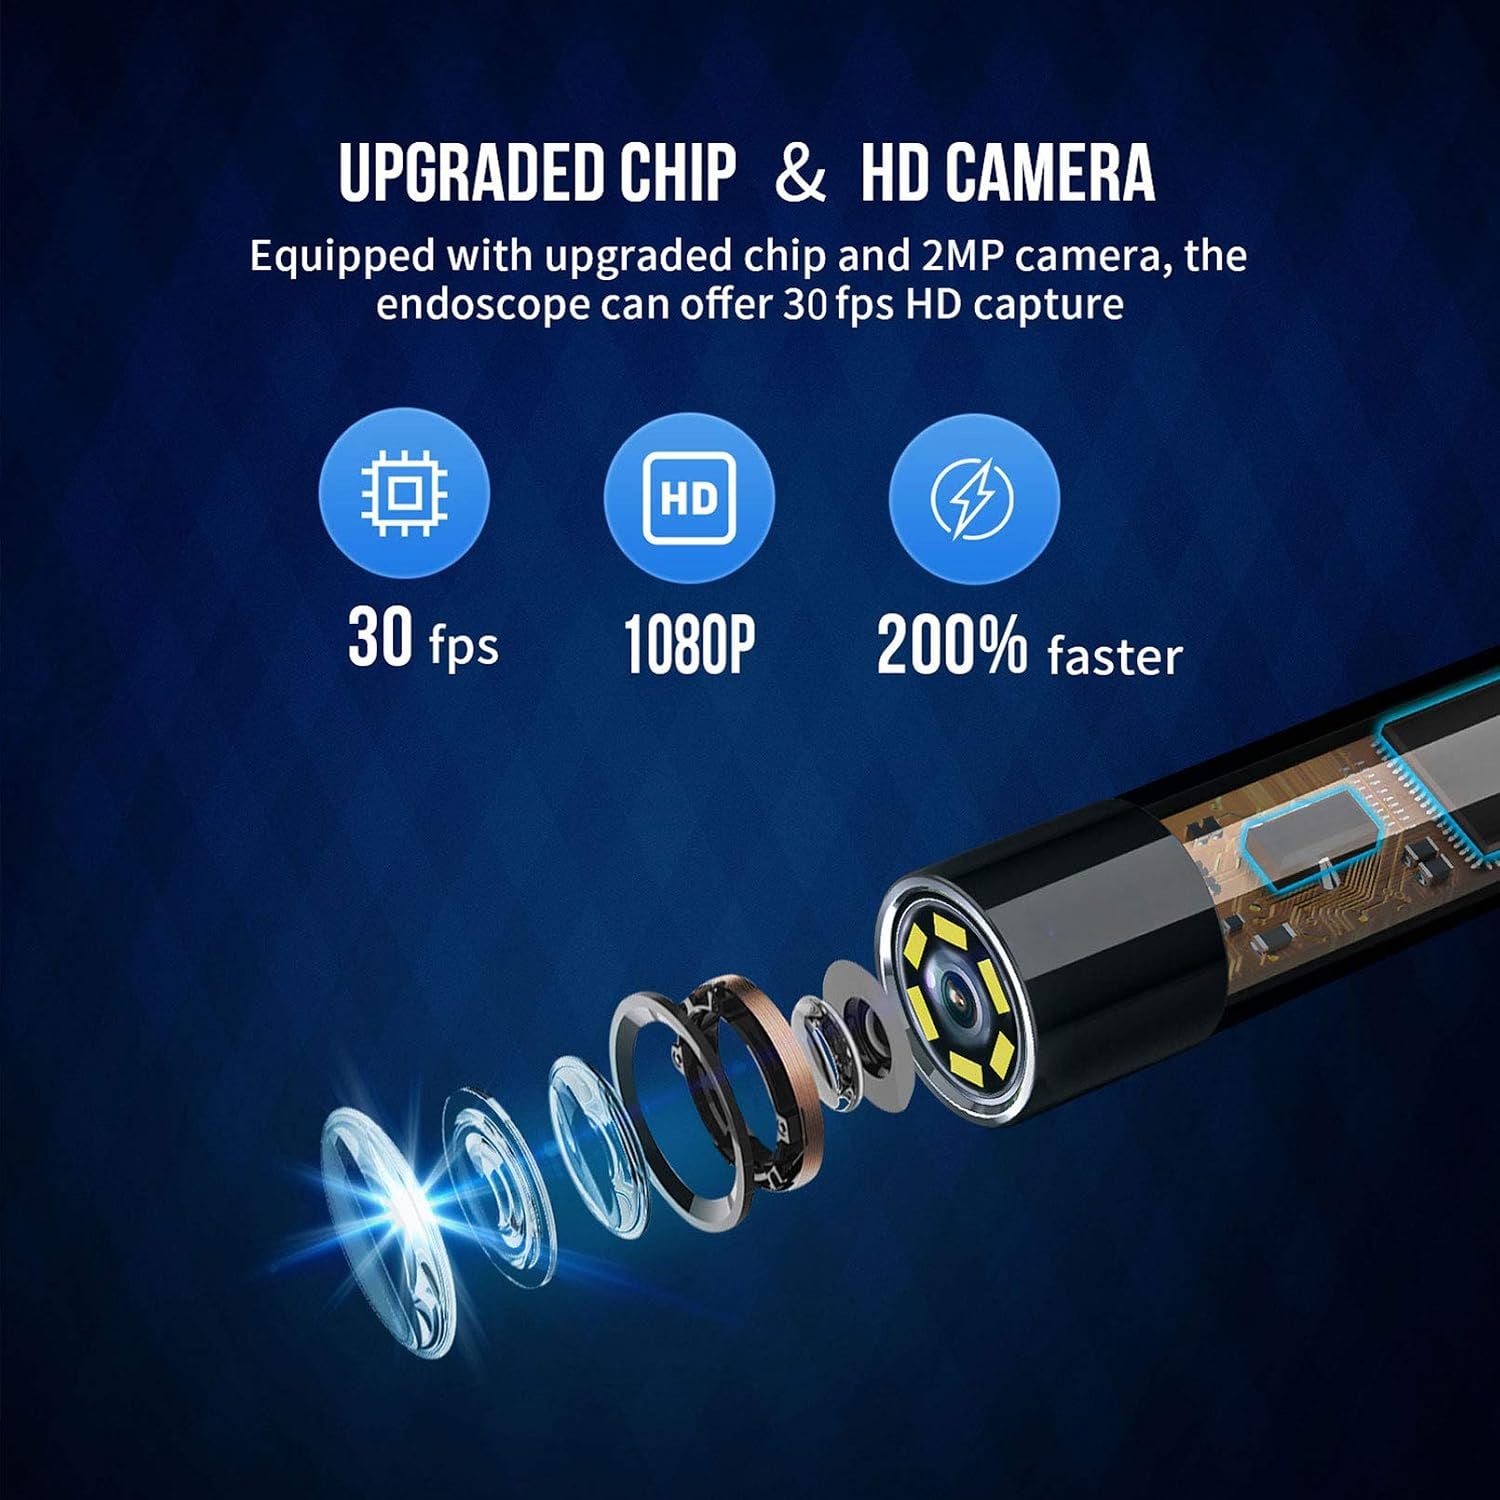
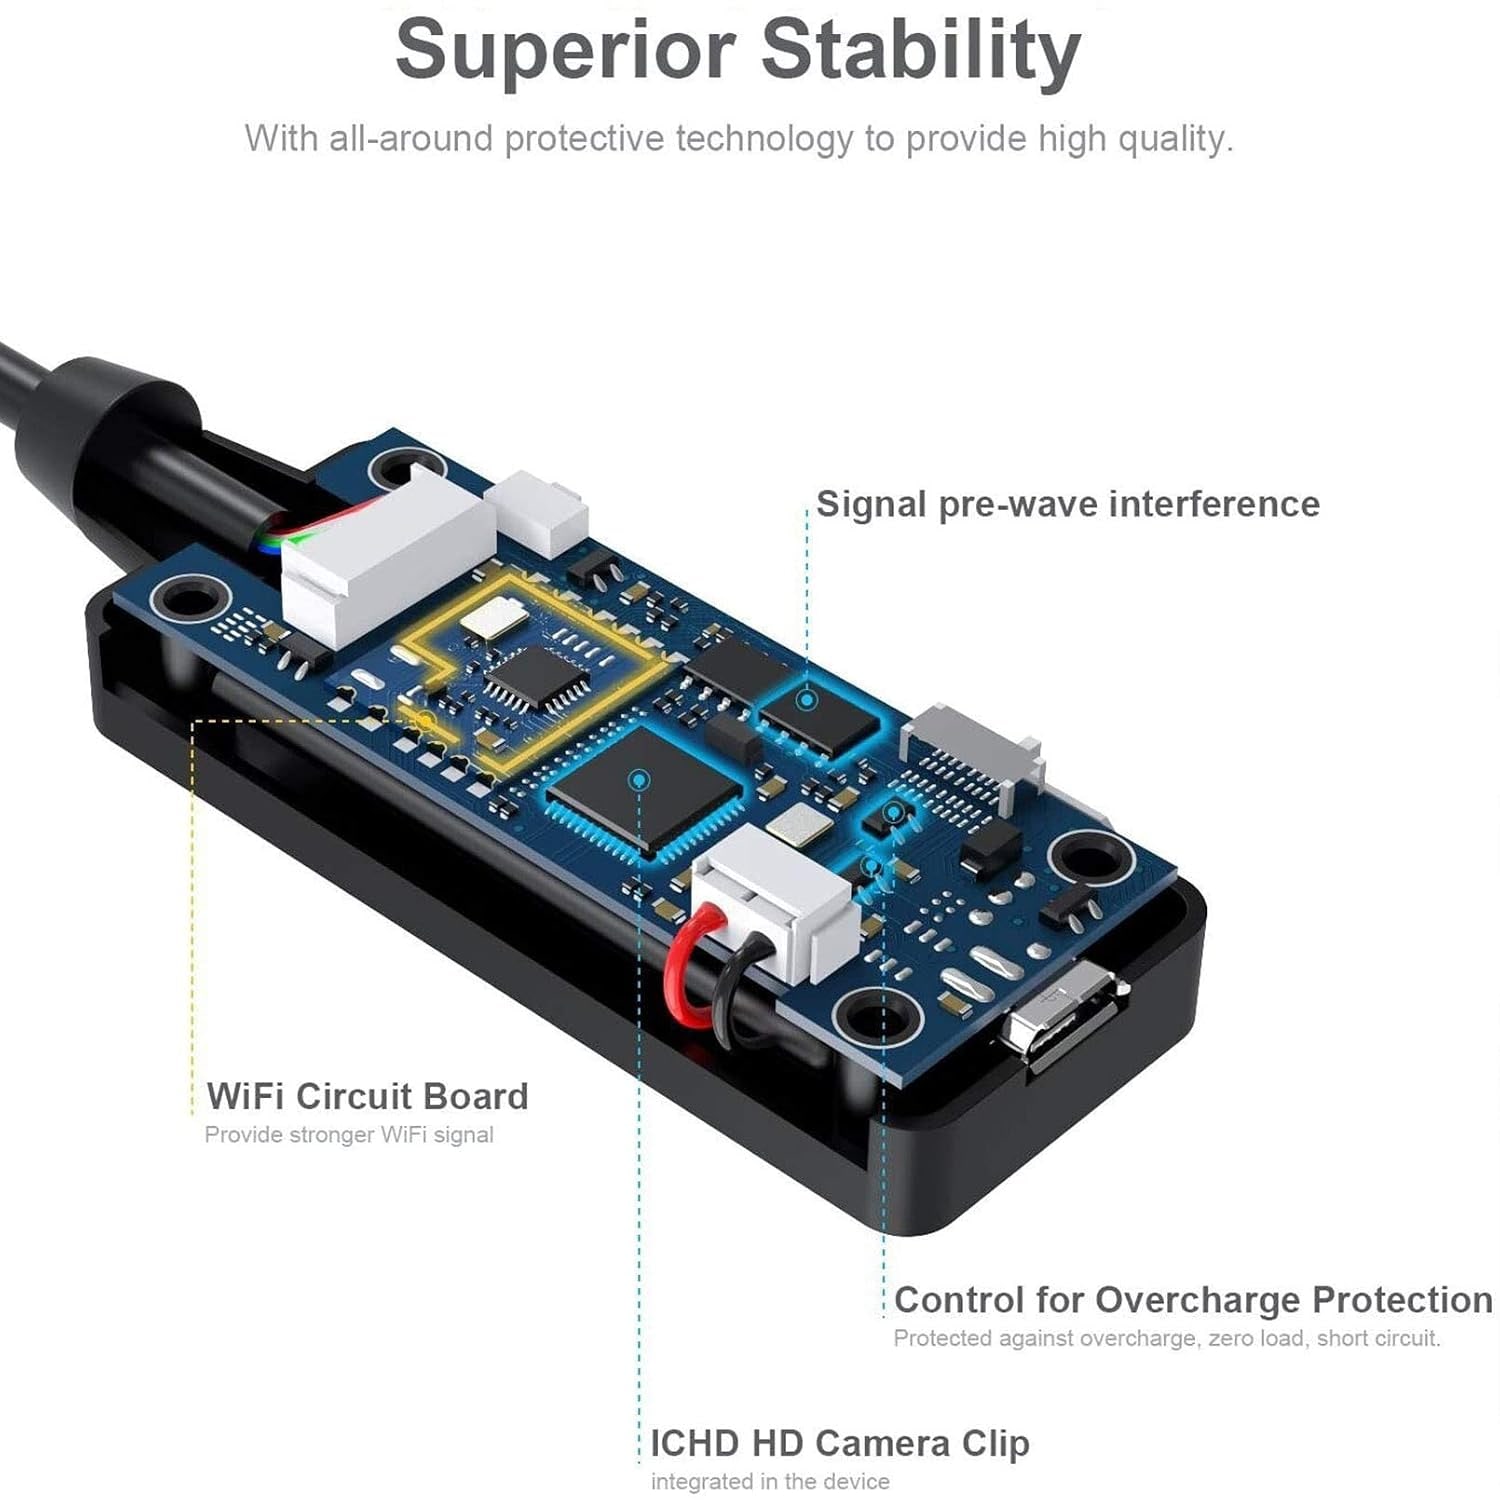
The parts are simple. A tiny CMOS image sensor sits behind a lens at the tip of a long cable. Ringed around it are LEDs, because nothing you want to inspect has its own lighting. A wire runs the signal back up the cable to a small Wi-Fi box. Your phone connects to it via WiFi and you see a live picture.
That last part is what makes these tools affordable now. Older inspection cameras needed their own screen, their own battery for the screen, and their own storage. All of that doubled the cost and the bulk. Using the phone already in your pocket removed most of the price and most of the weight. This unit weighs 80 g.
On this camera, the sensor records 1080p video as AVI files and captures 2 MP stills as MJPEG. The lens covers 90 degrees and is fixed focus, tuned for subjects 3 to 10 cm away. The spec table gives exposure control as manual, an ISO range of 100 to 3200 and digital image stabilization.
Why probe diameter decides everything
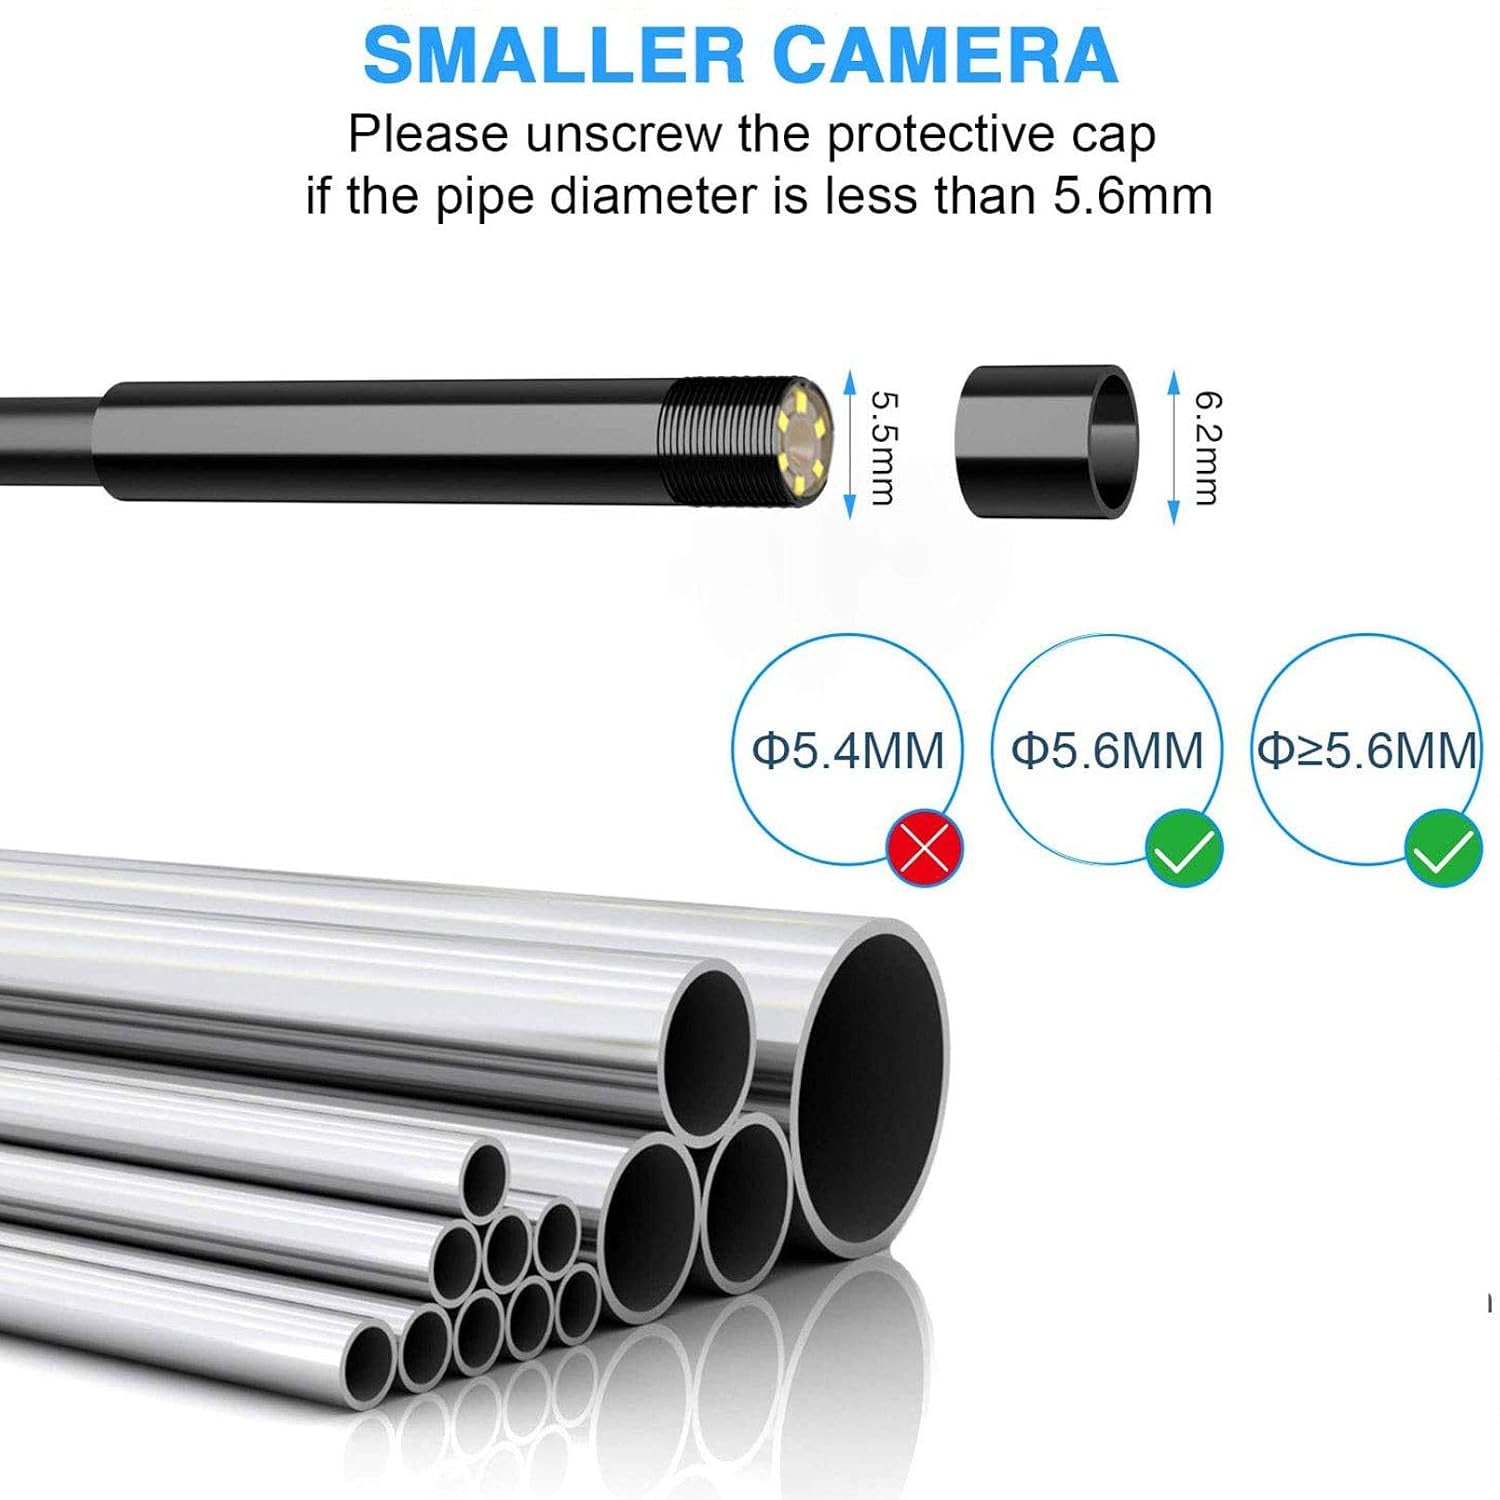
Before you compare anything else, measure the opening you need to get through. Diameter is the hard limit. A camera that will not fit is useless no matter how sharp the image is.
At 5.5 mm, this probe fits openings of 5.6mm and wider, according to the maker's photos, once you unscrew the 6.2mm protective cap. That takes in spark plug holes, drain cleanouts and a hole you can drill in drywall with a common bit. Smaller 3.9 mm probes exist for tighter work, but they tend to carry weaker sensors and fewer lights. Larger 8 mm probes usually have better optics but will not go where this one goes.
For general home and vehicle use, something in the 5 to 6 mm range covers the widest spread of jobs. That is why a 5.5mm borescope probe is a common choice. It is the practical middle.
Cable length and why semi-rigid matters more than you think
This cable runs 4.92 ft. For engine work, appliance repair, cavity checks and short drain runs, that is comfortable. For a long sewer line or a deep chimney flue, it is not enough, and you would want a dedicated reel system instead.
The more important quality is that the cable is semi-rigid. Bend it and it stays bent. That sounds minor until you try the alternative. A fully flexible cable buckles the moment you push it against resistance, then springs back out of the hole. A semi-rigid one lets you shape a gentle hook, push past a bend, and keep the lens pointed at the thing you actually want to see while both your hands do something else.
In practice, you spend the first minute of any inspection bending the cable into the rough shape of the path ahead. Then you feed it in and make small corrections. A good flexible inspection camera is really a semi-rigid one.
Light is the hardest part
New users expect resolution to be the limiting factor. It almost never is. Lighting is.
Six LEDs sit around this lens, and their brightness is adjustable. Inside a dark duct or a sealed cavity, you want them near full output, because there is no ambient light at all. But point full-brightness LEDs at a polished cylinder wall or a puddle, and all that light bounces straight back and whites out the frame. You see a glowing blob and nothing else.
Dimming the lights fixes it. So does changing your angle slightly so the reflection goes somewhere other than the lens. Spend a few minutes learning the LED brightness control before a job matters.
Getting the focus right
Fixed focus confuses people at first. There is no autofocus hunting, no tap-to-focus. The lens is simply set for a band of distance, here 3 to 10 cm, and your job is to hold the head inside that band.
Too close and everything goes soft. Too far and you lose the detail that made you look in the first place. Practice at home. Feed the camera toward a coin or a printed page and watch where the image snaps clear. Once your hands know what 5 cm feels like at the end of the cable, real inspections get much faster.
Water, dirt and what the rating means
The maker gives the camera an IP67 waterproof rating and says it suits damp or wet areas. Wet traps, damp sumps and condensation in a duct are the kind of places it is meant for.
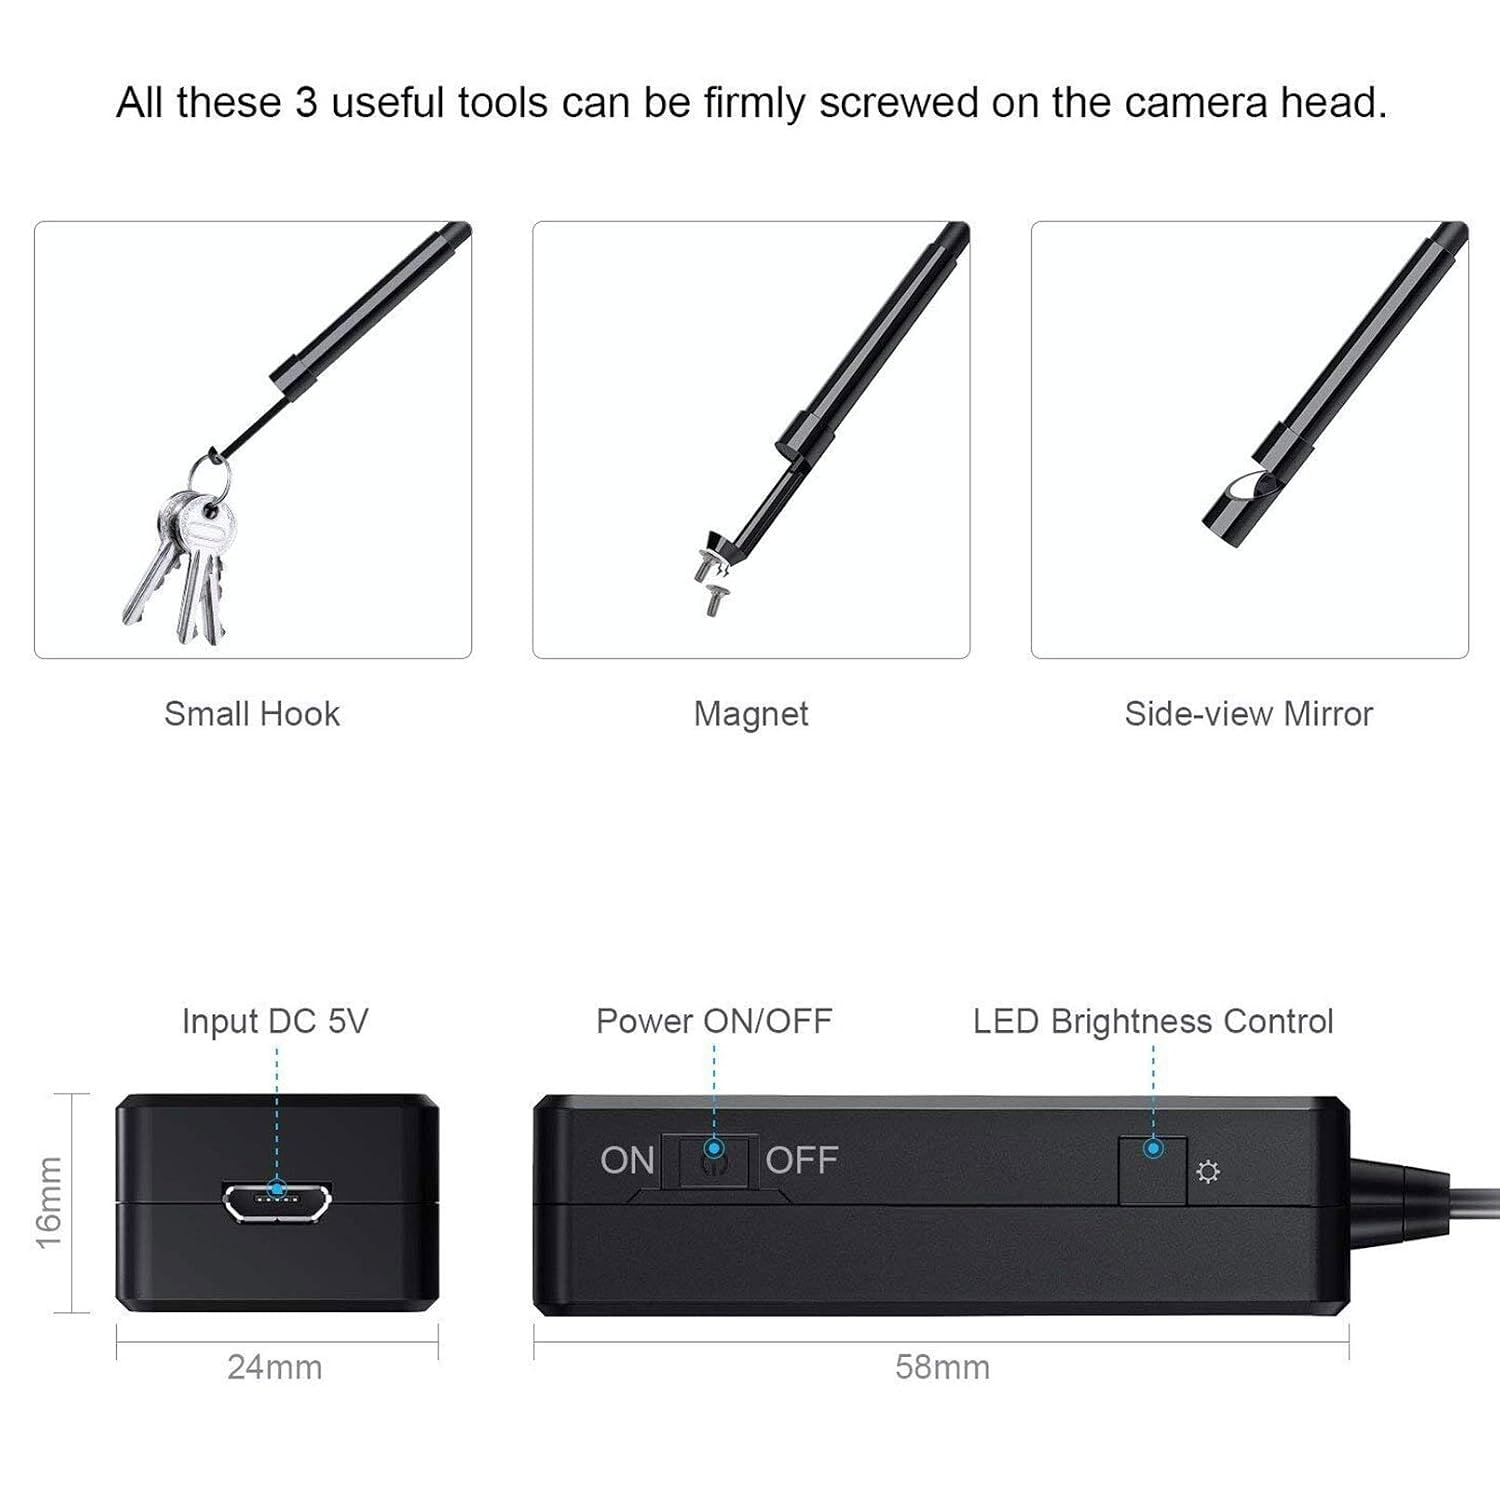
The maker does not say which parts the rating covers, so treat the Wi-Fi box, with its switch and charging port, as the part to keep dry. Also keep the probe away from fuel, solvents, acids and anything hot. Seals are designed for water, not chemistry.
After a dirty job, wipe the head and cable with a damp cloth, then dry them properly. Water trapped in a coiled cable does nothing good over months in a tool bag.
Who gets the most out of one
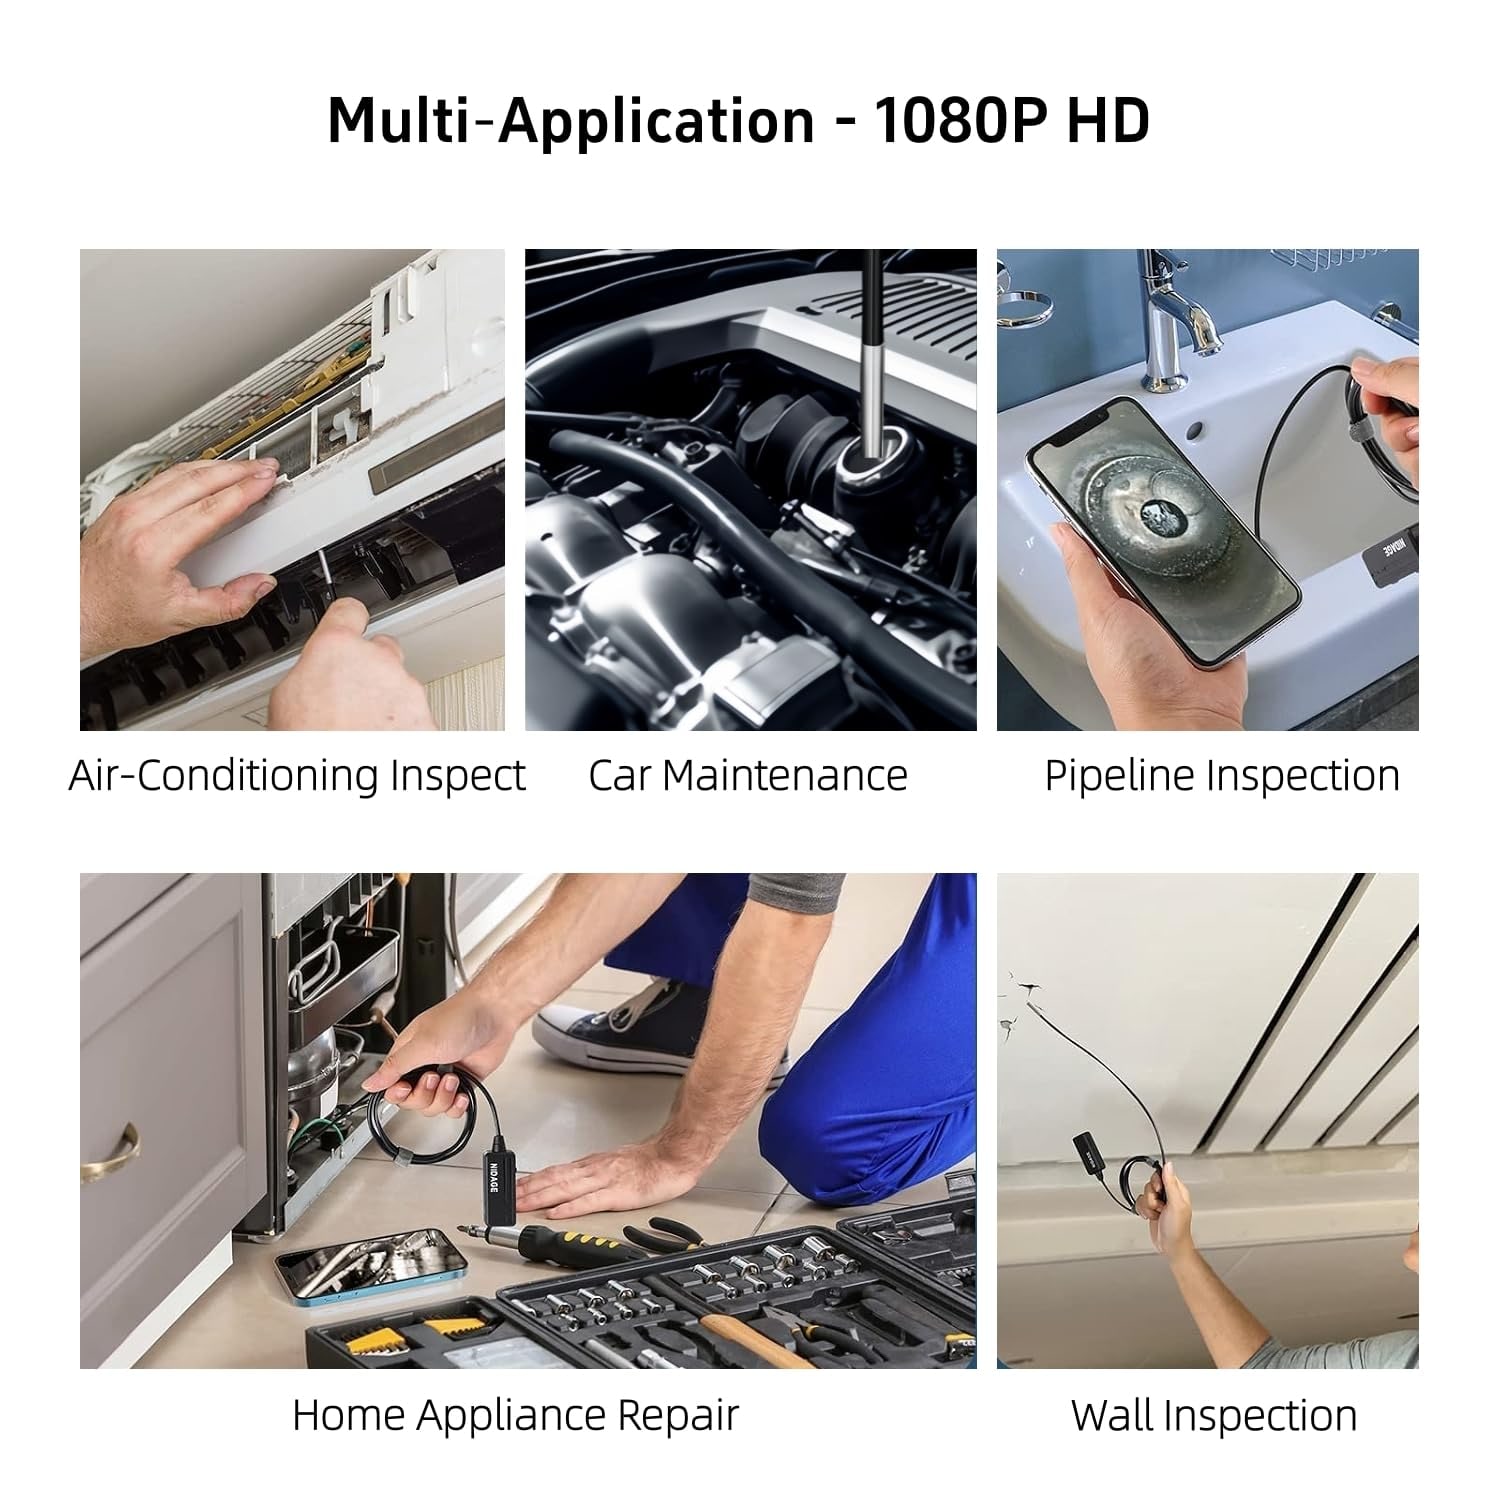
Home mechanics use these constantly. Looking down a plug hole at a piston crown, checking a cylinder wall for scoring, finding where a leak starts behind a manifold, retrieving the socket that fell into the bay. The hook and magnet accessories pay for themselves the first time something drops somewhere unreachable.
Plumbers and DIY homeowners use them on traps, cleanouts, under-sink joints and behind appliances. The magnet is handy for fished-out hardware; the side mirror lets you check the inner face of a pipe rather than just looking down the length of it.
HVAC work suits the slim head well, since register openings and access panels are often narrow. Electricians use them in stud bays and ceiling voids. And plenty of people buy one for a single stubborn problem, then find reasons to use it monthly.
Setup in two minutes
Charge the unit with the included charging cable. Power it on with the switch on the Wi-Fi box. Connect your phone to the device via WiFi, following the user manual, and you should see a live view.
The maker gives a battery average life of 3.5 hours, enough for a long session.
The maker gives the media type as no TF card, so plan on capturing through your phone. Check you have storage free before recording a long clip.
Caring for it so it lasts
Coil the cable loosely, never in tight kinks. The internal wiring is the part that fails first, and sharp bends are how it fails. Store the tool out of direct sun and away from heat.
Clean the lens cover gently with a damp cloth, no abrasives. If images start looking hazy, it is usually a film on the lens rather than a fault.
Charge the battery now and then even if you are not using the tool.
The short version
Measure your opening first. If 5.5 mm fits, this probe gets in. The 4.92 ft semi-rigid cable covers engine bays, under-sink work, duct openings and wall cavities, though not long sewer runs.
The 1080p sensor and 3 to 10 cm focal range give you sharp close-up detail where it counts. Six adjustable LEDs are what make the images actually readable, and being able to dim them is the feature you will appreciate most. The IP67 waterproof rating is there for damp and wet areas.
Connect over Wi-Fi, use your phone as the screen, and stop pulling things apart to find out what is wrong.